General FTP Configuration Guide
This article covers essential steps for setting up FTP on your cameras. It is based on the HIK Vision cameras and intended to be a guide of the setting that are required.
Note: For detailed instructions for you camera brand and type it is best to consult their user guides which can be found on the respective websites
Contents:
- Finding Your Camera’s IP Address
- Accessing the Camera’s Web-based Configuration Tool
- Configuring Motion Detection Settings
- Configuring Image Sending to Image Engine Servers
- Setting Up the FTP Server on the Camera
- Configuring Events, Alarms, and Actions
#1 Finding Your Camera’s IP Address
Consult the manufacturer’s configuration guide for more detailed information. To determine your camera’s IP address, use one of the following methods:
- Method 1: Network Scanning (Hikvision’s SADP tool, Dahua’s ConfigTool, or similar tools from other manufacturers)
- Method 2: Default IP Address (consult your camera’s user guide)
- Method 3: Utilise a tool such as “Advance IP Scanner to scan your local network
If your camera supports Wi-Fi, configure it using an Ethernet cable first.
#2 Accessing the Camera’s Web-based Configuration Tool.
Determine the port number required to access the web-based configuration tool of your camera. Consult the manufacturer’s documentation for the default port number. Launch a web browser and enter the IP address and port number of your camera. Log in using the default username and password (often “admin” | blank or “admin” | “admin”).

#3 Configuring Motion Detection Settings
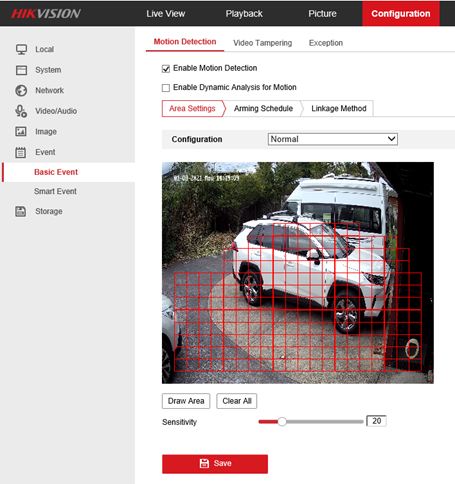
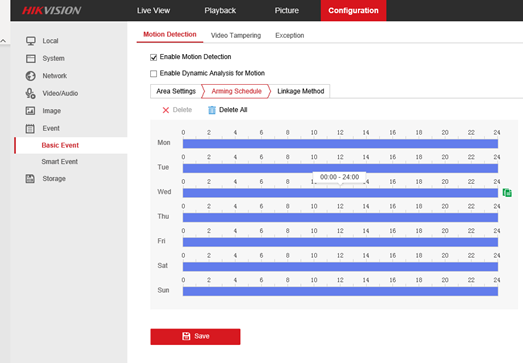
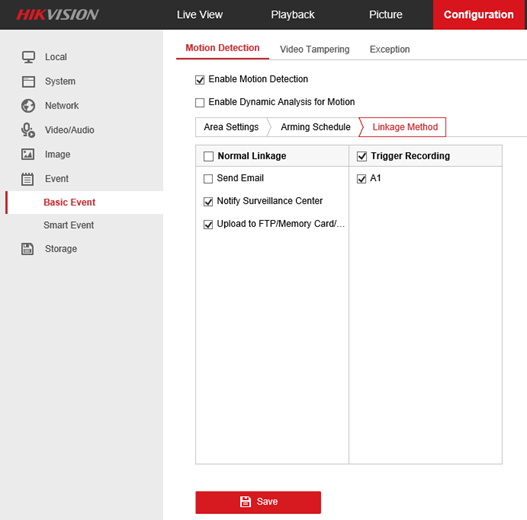
Configure motion detection to ensure efficient AI processing and image storage. Locate the Motion Detection option or other detection options in your camera’s settings, enable it, draw a motion detection area or line, and adjust the sensitivity level. Update the arming schedule and select appropriate linkage methods.
#4 Configuring Image Sending to Image Engine Servers
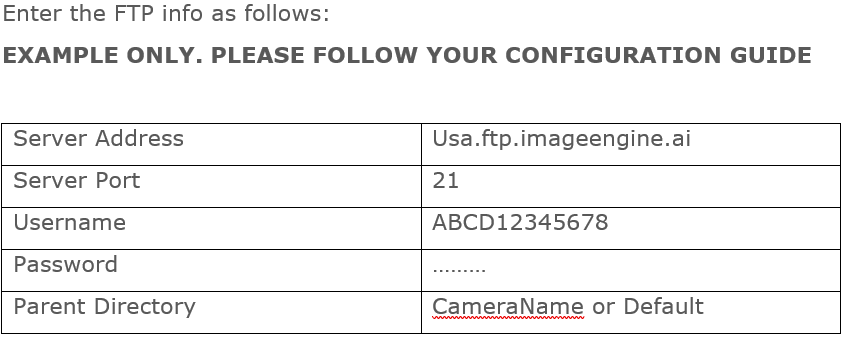
Set up the FTP server on your camera by locating the FTP server option in the Network > Advanced FTP tab. Enter the FTP information which was sent when configuing your device in the Image Engine portal. Check the “Use Passive Mode” option, if available. Click “Test” to verify the FTP settings and save the configuration.
#5 Configuring Events, Alarms, and Actions
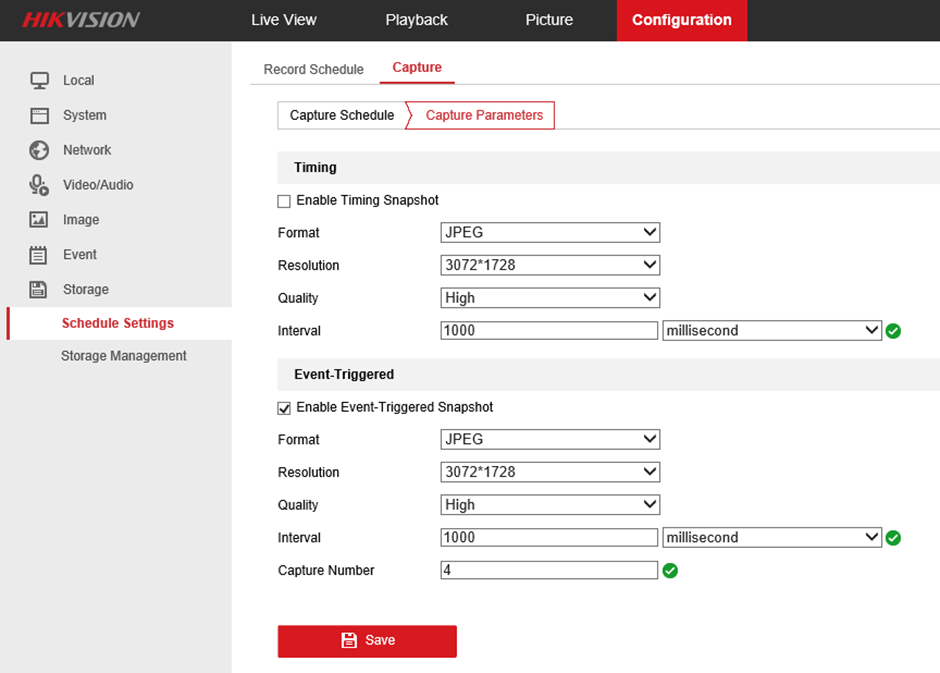
Configure additional settings to send images to the FTP server upon event triggers. For example, schedule image captures, set the number of images and interval between captures when the camera is triggered, and specify what to do with the images.

