Configuring AI Settings
When a new device is created, it defaults to detect general objects. This allows you to see what is detected in your initial uploaded images. However, this setting might not suit everyone, and therefore, the AI parameters may need adjusting.

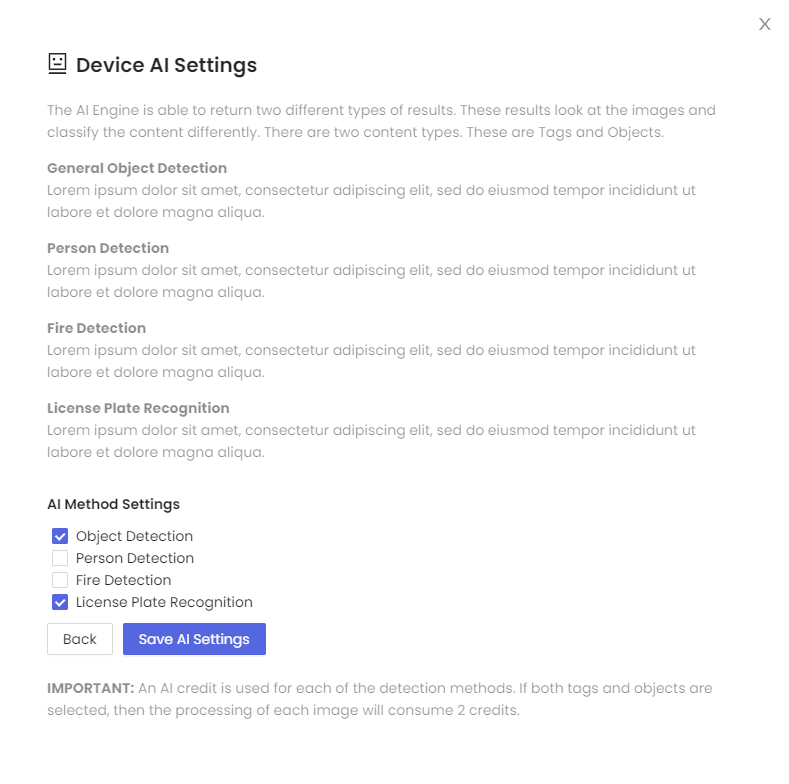
To modify the AI settings, navigate to your device and click on the cog icon, selecting ‘AI Settings’. In the device parameter screen, click the ‘Advanced Settings’ button.

Currently, there are four available AI models to choose from. You can either select one or multiple AI models to process your images. Please be aware that each model used will consume one credit. For instance, if you select three AI models, then three credits will be deducted for each image.
Select the suitable model and click the ‘Save AI Settings’ button. Then, click the back button to return to the previous screen. Here, you can select the tags you’re interested in. Ideally, some images should already be uploaded. Each uploaded image will display a list of tags detected by the AI, along with the confidence level. These tests can guide you in determining the appropriate device AI parameters.
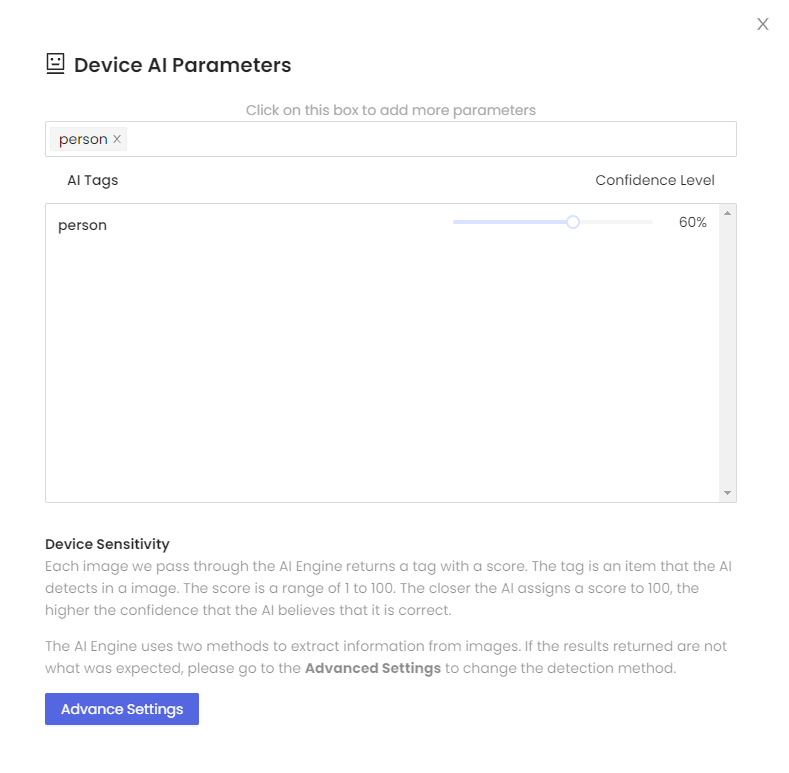
The ‘Device AI Parameters’ control the triggering of notifications. To add a tag, click in the search dialogue at the top and type the name of the tag for which you want to be alerted.

Upon selection, the tag will appear in the AI tags list below. To the right of this tag, there’s a slider representing the confidence level at which the AI model identifies an image. For example, if an image featuring distant people is uploaded, the AI model might only have a 63% confidence level. This suggests that the AI is fairly confident a person has been detected.
If the ‘Device AI Parameters’ slider is set to 60%, the image will trigger a notification event.

